
Seeded No-Knead Bread
The other day, I was looking at a collection of recipes. The link is here:
One recipe in particular stood out to me so I made it; here is the recipe link:
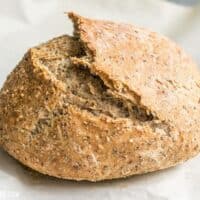
This bread is so good and it’s actually really easy to make. You just have to plan ahead to make bread like this because the dough needs to sit for at least 12 hours before you bake it. Is it weird that I took so many photos of this bread from a variety of angles? It’s just such a pretty loaf of bread! The bread has an amazing crust because it’s baked in a Dutch Oven.


Seeded No-Knead Bread
This simple Seeded No-Knead Bread is packed with seeds for extra texture, flavor, and nutrients!
Prep Time13 hrs
Cook Time40 mins
Total Time13 hrs 40 mins
Servings: 4
Ingredients
- 2 Tbsp rolled oats $0.02
- 1 Tbsp chia seeds $0.16
- 1 Tbsp hemp seed hearts $0.17
- 1 Tbsp ground flaxseed $0.04
- 1/2 cup warm water $0.00
- 1 cup all-purpose flour $0.08
- 1/2 cup whole wheat flour $0.10
- 3/4 tsp salt $0.02
- 1/8 tsp instant yeast (or bread machine yeast) $0.02
- 1/2 cup room temperature water $0.00
Instructions
- Place the oats, chia seeds, hemp hearts, and flaxseed in a small bowl. Add 1/2 cup warm water and stir to combine. Let the seeds soak for 1 hour.
- In a separate large bowl, combine the all-purpose flour, whole wheat flour, salt, and yeast. Stir until very well combined. Add the soaked seeds and then stir until they are as combined as possible (the mixture will be fairly dry). Add about 1/2 cup water, or just enough to form a sticky dough. The dough should be wet enough that there is no dry flour left on the bottom of the bowl, but not so wet that it appears slimy. It should be sticky to the touch.
- Cover the bowl of dough loosely with plastic and let it sit at room temperature for 12-18 hours. If you can not tend to the dough within 18 hours, you can press "pause" on the fermentation by transferring the bowl to the refrigerator.
- When you're ready to make the bread, the dough should have expanded and have an almost fluffy appearance. Sprinkle it liberally with flour and scrape it away from the edges of the bowl. Turn the dough over on itself in the bowl a few times, adding more flour as needed to keep it from sticking to your hands, until it forms a smooth ball and is no longer quite as sticky.
- Transfer the ball of dough to a piece of parchment paper and let it rise for one hour. About half way through the rise time, place a Dutch oven, with its lid, into your oven and set it to bake at 425ºF. Allow the Dutch oven to preheat inside the oven for 30 minutes.
- Once the dough has risen a bit on the parchment (it will tend to spread out and not so much up), it's time to bake. Carefully remove the Dutch oven from the oven, remove the lid, and then lift up the entire piece of parchment with the dough and place them inside the Dutch oven. Place the lid back on the Dutch oven and carefully return it to the hot oven.
- Bake the bread in the Dutch oven for 30 minutes, then carefully remove the lid and bake for another 10 minutes so the top can brown. When finished baking, carefully pick up the parchment to lift the bread out of the Dutch oven and allow the bread to cool slightly before cutting and serving.
1 comment:
That looks really good!
~Have a lovely day!
Post a Comment