Showing posts with label dessert. Show all posts

Tuesday, January 28, 2020

Sugar Cookies with Lemon and Nutmeg (Vegan)


Sugar Cookies with Lemon and Nutmeg (Vegan)

Now that my husband has joined me in a plant based/vegan diet, we are seeking out lots of new recipes.  My husband has quite a sweet tooth so I make a treat to have in the house now and again and he’s trying to be good about limiting his portions.  Of course I enjoying having any excuse to bake and try new recipes.

I asked him what sweet treat he wanted after we finished off some yummy and healthy blueberry muffins the other day.  He said, “Sugar Cookies!”  Most vegan sugar cookies I found call for vegan butter or vegan buttery spread.  I’ve never purchased these items so I looked for a recipe which used oil instead of “butter”.  I found a great looking recipe on a blog called “The Mostly Vegan” and the recipe turned out great.  Here is the recipe link:


As if often the case with me, I decided to modify the recipe.  The sugar cookies I typically make are my husband’s Grandma’s recipe.  Unlike many sugar cookie recipes, Grandma’s recipe does not contain vanilla or vanilla extract; instead the cookies are flavored with finely grated fresh lemon zest and ground nutmeg.  The new recipe I was using called for vanilla so I just left that out. The new recipe I was using also called for adding colorful sprinkles to the cookie dough so the sprinkles were dispersed all through the dough.  I think that idea is brilliant but I had a feeling my husband would not like that.  So in my version of the cookies, I did not add any sprinkles to the dough but I added some colored sugar to the tops of my cookies as you can see in the photos.  

I am looking forward to making the new recipe again and will try it out with the sprinkles IN the dough. I think my friends at my fabulous local yarn store (Yarned & Dangerous, Canon City, Colorado) will like the colorful cookies!


Sugar Cookies with Lemon and Nutmeg
Based on a recipe found on “The Mostly Vegan” blog; Original recipe can be found here:


  • 2 cups unbleached, all-purpose flour
  • 1 teaspoon baking powder
  • ¾ teaspoon baking soda
  • 3/4 teaspoon coarse kosher salt (if using a finer grain salt, use just 1/2 teaspoon salt)
  • 1/2 teaspoon ground nutmeg (freshly grated if you have it)
  • 1 cup organic cane sugar
  • ½ cup neutral vegetable oil 
  • ¼ cup water
  • 1 teaspoon apple cider vinegar
  • finely grated lemon zest/peel from one small to medium sized lemon (I used a Microplane grater to finely remove/grate the yellow part only) 
  1. In a large bowl, whisk together flour, baking powder, baking soda, salt, and nutmeg. 
  2. In a separate bowl, whisk together sugar with oil, water, apple cider vinegar, and fresh lemon zest until smooth and incorporated.
  3. Add wet ingredients to the flour mixture and stir until well combined.  At this point you can refrigerate the dough or bake it right away. The original recipe suggests refrigerating the dough first so that the cookies do not spread too much while baking. I baked my cookies right away without first chilling the dough and I am happy with how the cookies turned out.
  4. Preheat the oven to 375 F. Line cookie sheets with parchment paper. Use an ice cream scoop or 2 tablespoon measuring spoon to portion dough into small mounds. Press down gently on the mounds with your palm to flatten slightly. Decorate the top of each cookie as desired (sprinkles, colored sugar, whatever you prefer on your sugar cookies).
  5. Bake for 8 to 10 minutes. The cookies should be puffed up and very lightly browned on the bottom (but not on the edges or tops). Remove from oven and allow to cool on the pan for 2 minutes before removing to a cooling rack. Repeat with remaining cookies.  
  6. Cookies will deflate slightly while cooling. Store in an airtight container for up to 5 days.


Monday, October 8, 2018

Healthy Marbled Chocolate Pumpkin Muffins


Healthy Marbled Chocolate Pumpkin Muffins


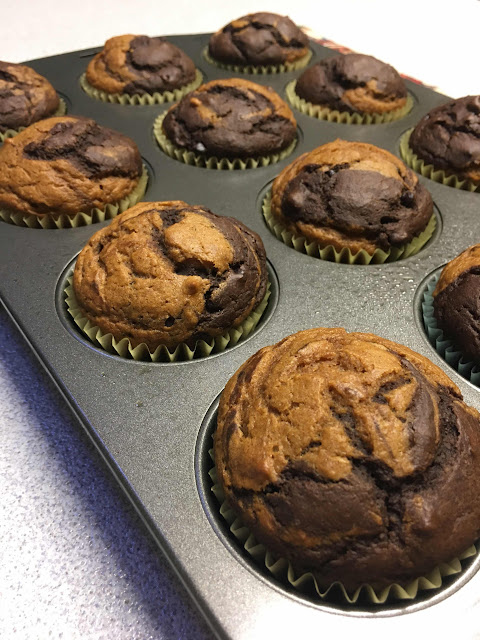
I get lots of emails from lots of cooking blogs to alert me about new recipes.  Today before we went for a hike with the dogs out in the cold and drizzly weather, I saw this recipe for Healthy Marbled Pumpkin Muffins featured on the "Ambitious Kitchen" blog.  I've been itchin' to do some bakin' so I made these muffins after our hike.  It was a good day to crank up the oven, warm up the kitchen, and fill the house with delicious smells... vanilla, cinnamon, pumpkin, allspice, chocolate.... Mmmmmm.


Aren't these gorgeous looking muffins? They were super fun to make.  Now I want to make marbled EVERYTHING!


I did not make many changes to this recipe.  I used vegetable oil in place of the coconut oil and just added it in with the other wet ingredients.  I used mini chocolate chips in place of larger chips and used less than the recipe called for.  For the flour, I used 1/2 white whole wheat flour and 1/2 unbleached all purpose flour.  The original recipe can be found HERE and also includes instructions for how you can make this recipe GLUTEN FREE and VEGAN if you'd like.

I'm looking forward to sharing these tasty treats with my friends at the yarn shop tomorrow!  I bet the ladies will love them.


Tuesday, June 12, 2018

Peanut Butter Chocolate Chip Chickpea Blondies (Vegan and Gluten Free)


Peanut Butter Chocolate Chip Chickpea Blondies


I've been eyeing this recipe for quite some time.  It's another great recipe from a blog called "Ambitious Kitchen".  I told myself that if there was a can of chickpeas in the cupboard, then I could make this recipe.  Otherwise, it was the Universe's way of telling me I did not need to bake ANYTHING!

As luck would have it, I had a can of chickpeas (a dented can marked down to $0.69, Organic Chickpeas from WalMart... Woo Hoo!).  I had the batter whipped up and the oven pre-heated in no time at all.  The house smelled HEAVENLY as these baked and cooled on the counter top.

When I make these again, I'll bake them a bit longer. The recipe calls for 20 to 25 minutes in the oven. I took mine out at about 22 minutes and, when I finally cut into them, they seemed a bit under done. The other change I would make is to reduce the salt a bit.  The recipe calls for 1/2 teaspoon salt (I used kosher salt) and they seem a bit salty to me.   As you can see, I used mini-chocolate chips in my blondies. I used only 1/4 cup and sprinkled a few more on top.  The recipe calls for more but I find that just a few mini-chocolate chips goes a long way.


Above:  out of the oven and looking delicious....


Before baking... the batter can be eaten raw since there are no eggs in the recipe.  The batter is also very tasty.  Of course I had to try it!

To see the recipe on the "Ambitious Kitchen" blog, click here.

Wednesday, April 18, 2018

Gluten Free Blondies with Surprising Ingredients


Gluten Free Blondies


I had a fun time playing around with some ingredients yesterday.  I have a recipe I love and it calls for... wait for it... black beans and avocado in brownies; you can see the recipe HERE.  I've made the recipe probably four times now and I just love it.  I've used a little extra avocado and it's great. I've used half cocoa powder and half whole wheat pastry flour and it's great. I've frozen the brownies... again... GREAT!

I got to thinking about recipes for blondies instead of brownies.  I decided to substitute banana for avocado and I decided to substitute cannellini beans (white kidney beans) for the black beans.  The original recipe calls for cocoa powder (no flour) so the original brownies are gluten-free.  My intention yesterday was to make the blondies and bring them to my Tuesday knitting group.  Janet in the group follows a gluten-free diet so I used pulverized rolled oats in place of cocoa powder.

These blondies are moist, sweet, and flavorful.  The only draw back was that the blondies were very crumbly.  I am sure I could play around with the ingredients a tad to try to make the blondies hold together a bit more but I wanted to type up this recipe "as is".  I did make a "a lifter" out of two pieces of foil in my baking pan. This was great to get the blondies out of the pan to cool and slice.  Since this treat is rather crumbly, I recommend making a foil lifter as I did.  You can see a photo of my prepared pan below. I just fold two pieces of foil to fit in the pan and over lap them in the style or shape of a "+" or plus sign and then I spray the foil with non-stick cooking spray. You could also make a lifter out of parchment paper if you desire.


Bean and Banana Blondies with Chocolate Chips and Walnuts

Ingredients
  • 1 large egg 
  • 1 - 15 oz can cannellini beans (white kidney beans), rinsed and drained
  • 1 medium sized ripe banana
  • 1 tablespoon vanilla extract
  • 1/2 cup packed light brown sugar 
  • 2 tablespoons extra virgin olive oil
  • 2/3 cup rolled oats
  • 1/4 teaspoon baking soda
  • 1/4 teaspoon baking powder
  • 1/8 teaspoon salt (I use kosher salt)
  • 1/4 cup mini chocolate chip
  • option:  add in 1/3 cup of chopped walnuts
Instructions
  1. Preheat oven to 350 degrees F. Make foil lifter: Take two strips of aluminum foil which are slightly narrower than the baking pan and the lay the strips of foil an 8 x 8 inch baking pan in the shape of a "+" or plus sign (see photos).  Spray with foil with non-stick cooking spray.
  2. Place the oats in the bowl of a food processor and pulverize until the oats resemble flour.  Pour the oat flour in a bowl; add in the baking powder, baking soda, and salt.  Stir with a fork to combine and set aside.
  3. Place egg, banana, beans, vanilla, brown sugar, and oil in the bowl of a food processor and process in until smooth. Add in ground oat mixture and process again until smooth.  Add in the chocolate chips and chopped walnuts (if using) and stir in with a rubber spatula.  Carefully remove food processor bland and pour the batter into the prepared pan; use spatula to spread batter evenly to sides.
  4. Bake for 35 minutes or until a toothpick inserted in center comes out clean and top of blondies is golden brown.  Cool in pan for about 10 to 15 minutes and then carefully remove the blondies from pan using the foil (or parchment paper) lifter.  Allow to cool to room temperature and then cut up as desired.  Since these are rather crumbly, you may wish to use a serrated knife.

Enjoy!


Friday, August 11, 2017

Black Beans and Avocado in What?


Hmmmm, what do you suppose I am making here?

Avocado... black beans...?

Ummm, brownies!  Yes, BROWNIES.

These are some UGLY brownies, but they are tasty.  My husband agreed to try them despite the fact that I first announced that they are healthy.  He said, "They are good!"  To which I replied, "Do you want to know what's in them?"  He shook his head and said, "No! Don't ruin it!"

So there you have it.  They are UGLY, they are sort of HEALTHY, and they are GOOD!

The recipe is from a blog called "Ambitious Kitchen". I find a lot of good recipes there.


Black Bean Avocado Brownies


Ingredients
  • 1 large flax egg (I used a egg instead)
  • 1 - 15oz can low sodium black beans, rinsed and drained
  • 1/2 medium to large ripe avocado
  • 1 tablespoon vanilla extract
  • 1/2 cup packed dark brown sugar (I used light brown sugar)
  • 2/3 cup unsweetened cocoa powder
  • 1 teaspoon coconut oil
  • 1/4 teaspoon baking soda
  • 1/4 teaspoon baking powder
  • 1/3 cup vegan chocolate chips, plus 2 tablespoons for sprinkling
  • option:  add in about 1/2 cup of chopped walnuts
Instructions
  1. Preheat oven to 350 degrees F. Grease a 8×8 inch baking pan.
  2. Place flax egg, black bean, avocado, vanilla, and brown sugar and process in a food processor until smooth. Add in cocoa powder, coconut oil, baking soda, and baking powder and process again until smooth. Batter will be thick. If batter is way too thick and won't process, you can add in a tablespoon or two of almond milk. This batter needs to be very thick in order to produce fudgy brownies. Fold in chocolate chip or sprinkle onto batter then transfer to prepared pan and use a spatula to spread evenly to sides. Sprinkle top of batter with 2 tablespoons of remaining chocolate chips.
  3. Bake for 22-30 minutes or until knife inserted in center comes out somewhat clean. We don't want these to dry out, but we also don't want them completely raw either! The top of the batter should be completely set and no longer jiggle. Cool pan completely on wire rack then cut into 12 bars.


Yep, those are pretty ugly, huh?

As we were sampling these brownies, the UPS man rang the door bell. 


Corn!  My mother-in-law sent corn from Iowa!  Dinner is served. 

Yes, we had brownies and corn for dinner. It was a GREAT dinner! 

Plenty left for tomorrow, too!  This corn is so good. 


Also, check out these super cute corn plates. They were a gift from my good friend, Tracy W.  I just love these little plates!


Monday, May 15, 2017

Vegan Chocolate Chia Pudding


vegan chocolate chia pudding

http://namelymarly.com/vegan-chocolate-chia-pudding/


I made myself a little chocolatey treat for myself on Mother's Day.

Ingredients

  • 2 tablespoons cocoa powder
  • 1 cup plant-based milk sugar-free
  • ⅓ cup chia seeds
  • 1 tablespoon vanilla
  • ½ cup pitted dates softened (I used 2 1/2 tablespoons of maple syrup instead)
  • Topping: 2 teaspoons dairy-free chocolate chips chopped
  • Additional Toppings: Granola, Sliced Almonds, Coconut Slivers and Coconut Whipped Cream

Instructions

  1. Mix ingredients in a food processor bowl (I used my Ninja blender) Note: If your dates are not soft, be sure to microwave them for about 30 seconds to soften them. Pulse until the dates are smooth.
  2. Cover and refrigerate at least an hour or up to 8 hours. It will thicken more the longer it sits, so if you prefer a firmer pudding, refrigerate overnight.
  3. Sprinkle the top with chopped dark chocolate chips and almond slivers before serving. Add additional toppings if you'd like, such as granola or whipped cream.


I really liked this treat. Next time I make it, I will portion this into three servings (instead of two) and I'll go crazy with some toppings.  I think it's nice to have some texture contrast with the creamy pudding.  I am thinking granola, toasted nuts, toasted coconut... crunchy things.  I had bananas but I think strawberries would be good too.  I am looking forward to trying out some other chia pudding recipes as well.


Saturday, April 29, 2017

Healthy Double Chocolate Zucchini Muffins


Healthy Double Chocolate Zucchini Muffins


Healthy Double Chocolate Zucchini Muffins
Recipe from "Ambitious Kitchen"
Link:  http://www.ambitiouskitchen.com/2014/07/healthy-double-chocolate-zucchini-muffins/
Ingredients
  • 1 1/4 cup whole wheat pastry flour or white whole wheat flour
  • 1/3 cup unsweetened cocoa powder
  • 1 teaspoon baking soda
  • 1/4 teaspoon salt
  • 2 tablespoons coconut oil, melted and cooled (I used extra virgin olive oil)
  • 1/3 cup honey or agave nectar
  • 1 teaspoon vanilla
  • 1 egg
  • 1 egg white
  • 1 cup shredded zucchini (about 1 medium)
  • 1/4 cup unsweetened applesauce (you can also use greek yogurt!)
  • 1/2 cup Almond Breeze Unsweetened Almond Milk
  • 1/2 cup regular or mini chocolate chips (I used a little less)
Instructions
  1. Preaheat oven to 350 degrees F. Line 12 cup muffin tin with cupcake liners and generously spray inside of liners with nonstick cooking spray.
  2. Squeeze shredded zucchini of excess water with a paper towel. This is important, so don’t forget!
  3. In a medium bowl, whisk together flour, cocoa powder, baking soda, and salt; set aside.
  4. In the bowl of an electric mixer, add coconut oil, honey, vanilla, egg and egg white; mix on medium-low until smooth and well combined. Add in zucchini, applesauce, and almond milk; mix again. Slowly add in dry ingredients and mix until just combined. Gently fold in chocolate chips.
  5. Evenly divide batter into prepared liners. Bake 22-25 minutes or until toothpick inserted into middle comes out clean. After 5 minutes, remove muffins and transfer to wire rack to finish cooling. Enjoy!
Notes
To keep muffins dairy free, use dairy free chocolate chips.

I love adding a few extra chocolate chips (2-3) on top of each muffin before baking to make them look pretty, but it's up to you!


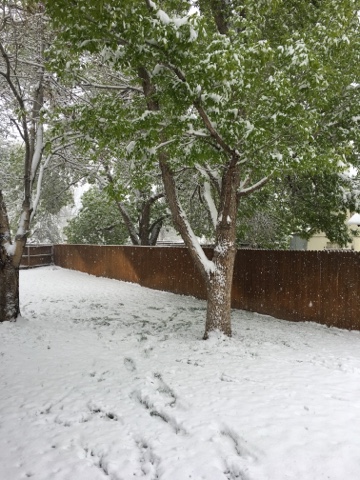
It's a cold and snowy April day in Southern Colorado.  Despite there being leaves on all the trees, as there should be this time of year, we have wet, gloppy snow coming down.  Hopefully we don't lose any tree limbs and hopefully we don't lose heat and power with limbs falling on above ground power lines.  We briefly took the dogs for a walk this morning, but it was cold, wet, and WINDY.  When I came home from our brief morning walk, cranking up the oven seemed like a really good idea. I made these Healthy Double Chocolate Zucchini Muffins from www.ambitiouskitchen.com.  These muffins are delicious and taste just like cake.  My muffins are a little crumbly but I am not complaining.  Did you hear me say... "they taste like CAKE?!?" 


Saturday, March 11, 2017

Mace Lemon Sugar Cookies


Mace Lemon Sugar Cookies 


I received a nice big assortment of spices as a gift not too long ago.  How fun is that!? The box contained many spices I've never used or purchased before.  Celery Salt, California Sweet Basil, French Thyme, White Pepper, Marjoram, Turkish Seasoning, Vietnamese Cinnamon, and Double Strength Pure Vanilla Extract.  I started to search around on the internet for some inspiration as to how to use some of these spices and, when I was looking up mace, I found that mace and nutmeg are related. Specifically, I learned this:

The nutmeg tree, Myristica fragrans, is the only tree that produces two separate spices. The fruit contains a hard pit, which is a nutmeg, while the lacy red membrane which surrounds it is mace. The delicate membrane is carefully peeled away from the shell of the nutmeg and spread to dry in the sun, fading from bright red to orangy-brown as it dries.

Mace is a common ingredient in Northern European cooking, showing up in hearty vegetable dishes, cream sauces, and sausages. In baking, mace can be used as a substitute for nutmeg; its mellower flavor is especially nice with fruits or delicate pastries. It’s delicious in pumpkin pie or baked winter squash dishes.

SOURCE:  https://www.thespicehouse.com/mace-blade

Since I love cookies, the first thought I had was to use the mace in some sugar cookies.  I did not have to look far to find a great sounding recipe and, as luck would have it, I had all the ingredients on hand.  And they way my brain works, if I have all the ingredients on hand, the Universe is telling me that I MUST bake these cookies.  I made the cookies and they were fantastic. 

I think these sugar cookies are unusual because the recipe calls for brown sugar and vegetable oil.  The recipe specifies the flour should be sifted but I was too lazy for that.  Also, the recipe specifies that the dough balls should be flattened using a buttered drinking glass.  My dough was very moist and loose and I did not feel the cookies needed to be flattened.  Instead, I portioned out the dough using my cookie scoop and then just sprinkled a very small amount of the sugar topping on each cookie.  As you can see from the photos, the cookies spread out nicely.  Since I did not flatten the cookies with a buttered drinking glass coated in the sugar topping, I probably only used a few teaspoons of the sugar topping and threw the rest away.  When I make this recipe again, I'll just measure out a few teaspoons of sugar for the topping and add in just a pinch of nutmeg and a pinch of mace.  The recipe source is here:

http://www.tampabay.com/features/food/cooking/you-asked-for-it-lemon-mace-cookies/984402


LEMON MACE SUGAR COOKIES

COOKIE DOUGH:

2 c. all purpose flour
2 tsp. baking powder
1/2 tsp. salt
1/4 tsp. mace
2 eggs
2/3 c. vegetable oil
3/4 c. granulated sugar
1/4 c. brown sugar
2 tsp. grated lemon peel
2 tsp. lemon juice

TOPPING (see notes above)

1/4 c. white sugar
1/2 tsp. nutmeg
1/4 tsp. mace

Sift together flour, baking powder, salt and mace. combine remaining ingredients and beat until thick. Stir in dry ingredients and beat until thick. Drop by teaspoons on greased cookie sheet. Combine sugar, nutmeg and mace. Lightly butter bottom of a glass; dip in sugar mixture and press cookies flat (see notes above). Bake 8 to 10 minutes at 400 degrees.

Thursday, February 23, 2017

Yogurt Treat

At the grocery store, I imagine you've noticed these fun and yummy looking yogurt treats.  Chobani brand has "Chobani Flips" and Fage brand has "Fage Crossovers".  As you can see above, the yogurt container has two compartments and you can flip the container of toppings into the container holding the yogurt.  I keep eyeing these at the store and considering trying one since I had a coupon, but these treats have a lot of sugar in them (20 grams of sugar per serving which is equal to 5 teaspoons of sugar in one serving).

I decided to try out my version of this flavor combination at home just the other day and it was a really yummy treat.  The Fage Crossover above is Greek yogurt with caramel blended in and the topping is honey roasted salted almonds.  Sounds amazing!


For my at-home version, I started with Fage brand plain 2% milkfat Greek yogurt and drizzled over about a teaspoon of pure maple syrup.  I topped it off with some roasted & salted almonds that I chopped up using my Pampered Chef food chopper. I love that thing!


This is a really good treat. It's healthy enough for a meal or snack but makes a nice dessert, too.  I think it also might be good with some sliced banana added in.  Maybe I'll try that next time!?!

Thursday, January 5, 2017

Banana Sushi


Banana Sushi

I get so many emails from various food blogs and I see so many images of food and recipes on Facebook.  Banana Sushi!  Why have I not heard of this before?  This idea really appealed to me (Get it... appealed to me... as in bananas have to be peeled.  I crack myself up!).

Based upon a photo I saw on Facebook the other day, I just took the idea and ran with it.

I started with a ripe banana and topped it with some natural peanut butter. Adams 100% Chunky All Natural Peanut Butter is my new favorite; this is the kind of peanut butter you have to stir and store in the refrigerator, so I warmed up my peanut butter for 10 to 15 seconds in the microwave oven so it was a bit easier to spread on the banana.  I used a little less than 1 tablespoon of peanut butter.

Of course you can use other things in place of peanut butter... almond butter, Nutella, etc.
Easy so far, right?  I think this would be a great recipe for kids by the way.


Next I topped the peanut butter with a little unsweetened coconut and some mini chocolate chips.  Next time I'll leave off the coconut. It was not bad; it just really did not add much in the area of texture or flavor. 

You can really top this how ever you like. Rainbow sprinkles, chopped nuts, granola, Fruity Pebbles cereal... whatever floats your boat.


Finally, I added a few chia seeds... again, totally optional; I like the added crunch and chia seeds are good for me.  I patted the toppings into the peanut butter with my finger tips just a bit so they would stick better and then popped it all into the freezer for about 10 minutes.


After 10 minutes, using a sharp knife, I sliced the banana into slices as you see above at the top of the page... just like a sushi roll!  I returned it all to the freezer and had this for a late afternoon snack. It was fun to enjoy a frozen treat.  I intended to make this into two or three portions... but that did not happen.  It was delicious!

I'll have to make another Banana Sushi Roll again soon and maybe try out some other toppings. 

Of course, you don't have to freeze this treat.  You can make your Banana Sushi, slice it, and enjoy it right away.

For more Banana Sushi inspiration... look on Pinterest or do a Google search for "banana sushi".  Apparently, this is been all over the Internet for months and some how it slipped past me (Oh, there I go again... slipped... as in slipped on a banana peel.  Hilarious!  Or maybe I am punchy and I need a little nap).

Enjoy!

Tuesday, September 13, 2016

Cookies with a Surprising Ingredient


You'll never guess what is in these cookies!


Do you see it in there?  I'll give you a HINT!  It's something GREEN...


Zucchini!

I made and shared these cookies with my knitting class last week and everyone LOVED them!  I first saw these cookies on a blog I recently discovered called "Yellow Bliss Road".  The writer of this blog added in orange extract and some other ingredients I did not have.  I saw that the original blog source for the recipe (called "Two Peas and Their Pod") contained ingredients I did have on hand so I followed that recipe primarily.

Zucchini Coconut Chocolate Chip cookies
From www.twopeasandtheirpod.com

Ingredients:

1 cup all-purpose flour or white whole wheat flour
1 teaspoon baking soda
1/2 teaspoon salt
4 tablespoons coconut oil, melted and cooled to room temperature
1/2 cup dark brown sugar (I used light brown sugar)
1/4 cup granulated sugar
1 large egg
1 teaspoon vanilla extract
1 cup shredded zucchini
2 cups old fashioned oats
1/2 cup sweetened coconut flakes (I use unsweetened coconut)
3/4 cup semisweet chocolate chips
My addition:  about 1/2 cup chopped walnuts

Directions:

1. Preheat the oven to 350 degrees F. Line a baking sheet with a Silpat baking mat or parchment paper and set aside.
2. In a medium bowl, whisk together flour, baking soda, and salt. Set aside.
3. In a large mixing bowl, combine coconut oil and sugars, mix until smooth. Add egg and vanilla extract. Next, add the shredded zucchini. Mix until combined.
4. Slowly add flour mixture until just combined. Stir in oats, coconut, chocolate chips, and nuts (if using).
5. Drop cookie dough by heaping tablespoonfuls, 2 inches apart, onto prepared baking sheet. Bake for 10-12 minutes or until cookies are slightly golden around the edges and set. Remove cookies from pans; cool completely on wire racks.

These cookies are DELICIOUS!

Yellow Bliss Road Version can be seen here:


Two Peas and Their Pod Version can be seen here:

http://www.twopeasandtheirpod.com/zucchini-coconut-chocolate-chip-cookies/?m


Monday, January 26, 2015

Brownies with Yogurt, Applesause, and Walnuts


I have been craving brownies for quite some time now.  The other day, when I was making homemade yogurt, I was looking for healthier brownie recipes using applesauce.  Somehow I stumbled across a brownie recipe calling for applesauce and yogurt.  What luck! I now have a bunch of homemade yogurt. 

I just pulled these out of the oven and now the house smells like chocolate.  I am looking forward to trying a brownie when they cool a bit. They look really good.

I am not pretending that these brownies are health food.  But compared to another homemade brownie recipe I've made before (which call for 1 stick of butter) these are healthy-ER.  I used white whole wheat flour instead of all purpose flour.  That always makes me feel a bit better.  Eggs and yogurt are full of protein.  I did use 1 cup of brown sugar as the recipe calls for but I did not pack it down much at all.  I added some walnut pieces to the batter and I know walnuts have anti-oxidants. Applesauce comes from fruit.  And cocoa comes from a plant, so chocolate is technically a vegetable, right?  Ha, ha.  Just kidding.  I also noticed when looking at the original recipe that this 8 inch x 8 inch pan of brownies is considered 12 to 16 portions.  Who knew!?. I was going to cut this pan of brownies into maybe 9 brownies!  Okay, I'll cut them into small portions.

Skinny Brownies from www.yummyhealthyeasy.com
Recipe link is HERE.

Ingredients
  • ¾ cup all-purpose flour
  • ½ cup unsweetened cocoa powder
  • ½ tsp. salt
  • ¼ tsp. baking soda
  • 1 cup packed brown sugar
  • ½ cup unsweetened applesauce
  • ½ cup plain Greek yogurt (or low-fat sour cream)
  • 2 ounces semi-sweet chocolate, melted (I used chocolate chips)
  • 2 large eggs
  • 2 Tbsp. canola oil
  • 2 ounces semi-sweet or milk chocolate, chopped (I used chocolate chips)
  • 1/2 cup walnut pieces (some mixed in, some placed on top before baking)
Instructions
  1. Preheat oven to 350ยบ. Spray a 8x8 square pan with cooking spray then line with a strip of parchment paper, leaving an overhang on two sides. Spray paper with cooking spray, too.
  2. In a medium bowl, whisk together flour, cocoa, salt and baking soda.
  3. In another medium bowl, stir together brown sugar, applesauce, greek yogurt, melted chocolate, eggs and oil. Add the flour mixture and stir until just moistened.
  4. Spread batter in prepare pan. Sprinkle the top with the chopped chocolate pieces.
  5. Bake until a toothpick inserted in the center comes out with only a few moist crumbs attached, about 30-35 minutes.

Update:  these are great!  They are not very sweet which is fine with me. Next time I might use the full cup of packed brown sugar as called for in the recipe to make them a tad sweeter.  I cut them up and wrapped them up when they were still a bit warm and now they are very moist!


Saturday, January 17, 2015

Candy Cane Marshmallows


I mentioned in a prior post that we've been on a kick where we are trying to use up what is in the kitchen... the cupboards, the freezer, the refrigerator.  Sure, we've been going to the store to buy things to make meals with what we have on hand, but it's been fun to see what we can make.
 

Yesterday, I made up some lentils and some Candy Cane Marshmallows. The only think I needed at the store was a little jalapeno... for the lentils; NOT the marshmallows. 


For the lentils, I tried a recipe I found HERE called Smoky Lentils with Fire Roasted Tomatoes. The flavors in this recipe are great but, for some reason, my lentils just never seemed to soften up.  The lentils were rather old (do you think that could impact things?)  I added a lot more cooking liquid than the recipe called for. Today, I took the lentils, which I had put in the refrigerator over night, and I added them to the Crock Pot with a carton of chicken broth. I am hoping some simmering in broth will soften the lentils further and I will have a nice soup. I was planning to have the lentils with brown rice or quinoa for work week lunches, but soup sounds good, too!


The Candy Cane Marshmallows are a hoot to make. You do need two specific tools to make marshmallows at home:  a candy thermometer and a stand mixer. I use my Kitchen Aid stand mixer. If I remember correctly, I adapted this recipe from a Paula Deen recipe... maybe. It's been a long time. Now I am not sure.  The problem I have with making marshmallow is that the fluff gets so sticky I feel like a quarter of the recipe is wasted because it sticks to the bowl.  It makes me wonder if I don't need to whip the fluff as long as I do. 

Whatever the case may be, these little yummy fluffy pillows of marshmallow-y goodness are AMAZING in hot chocolate.  If you make these and try them in hot chocolate, I am sure you will write to me to thank me. Hee, hee! 

Candy Cane Marshmallows

3 packets unflavored gelatin (I used Knox brand)
1 1/2 cups granulated sugar
1 cup light corn syrup (I used Karo brand)
1/4 teaspoon salt (kosher or iodized is fine)
2 teaspoons pure peppermint extract
3 to 4 candy canes, crushed
confectioners' (powdered) sugar, for dusting

Lightly grease a small baking sheet (I use a roasting pan with sides) with Pam Non-stick cooking spray.  Sprinkle with a light coating of confectioners' sugar using a fine mesh sieve and set prepared pan aside.  Place candy canes in a gallon sized plastic zip close bag and crush the candy canes with a rolling pin or the flat bottom of a sturdy mug. 

Combine the gelatin with 1/2 cup of cold water in the bowl of an electric stand mixer fitted with the whisk attachment and allow it to sit while you make the syrup.

Meanwhile, combine the sugar, corn syrup, salt, and 1/2 cup water in a small saucepan and cook over medium heat until the sugar dissolves, stirring occasionally.  Once the sugar has dissolved, stop stirring and raise the heat to high and cook until the syrup reaches 240 to 25 degrees Fahrenheit on a candy thermometer. Remove from heat.

With the mixer on low speed, slowly pour the sugar syrup into the dissolved gelatin.  Put the mixer on high speed and whip until the mixture is very thick, about 15 minutes. Add in the peppermint extract and mix thoroughly.

This is the hilarious part.  Attempt to remove the marshmallow fluff from the bowl!  I found that it helps to use a sturdy spatula to help you with the task, but first spray the spatula with more Pam Non-stick cooking spray.  To spread the fluff into the prepared pan, wet your hands under the tap repeatedly or else the fluff sticks to your hands.

Sprinkle the crushed candy canes on top of the marshmallows.  Let the marshmallows set, uncovered on the counter top over night.

Cutting the marshmallows is also a tricky, sticky mess.  You'll find that the top and bottom of the marshmallows are dry and not too sticky, but once you cut into them, the newly exposed sides of the marshmallows are sticky.  My suggestion is to have more powdered sugar on hand while you are cutting them up and you can roll the marshmallows around in the powdered sugar so they don't stick together.  A nice clean pair of kitchen scissors might be a good tool for cutting up these stick buggers, but I have yet to try that.

Store the marshmallows in an airtight container so they keep fresh for several weeks.  Awesome in hot chocolate. Enjoy!